Tapestry Weaving: Using a Cartoon
Tempted to try tapestry weaving on a small scale? A cartoon — a pattern or template used to guide you as you weave — might be your best friend.
The world of tapestry weaving offers remarkable possibilities. It requires certain skills, but this shouldn’t keep you from dipping your toes into that water. Many of those skills aren’t difficult to learn. More important, those remarkable possibilities are very intriguing!
There are two basic facts to understand about traditional tapestry: it is weft-faced (meaning that the weft yarn completely covers the warp threads) and it is plain weave (meaning you go over one thread and under the next, alternating that order in the next row). You can create realistic pictures or you can weave abstract patterns. You can play with the colors and textures that delight you, influenced by what you see around you, what you imagine, and what you want to express. You don’t need to be an artist; you just need to love the feel of yarn in you hands and the pleasure of watching the play of colors as the tapestry unfolds.
The Cartoon
Feeling ready to weave? It’s often helpful to use a pattern, or template, to guide you work. In tapestry weaving this pattern is called a cartoon, and it allows you to work out on paper the various elements of your design and their relationship before you begin to weave.
Avoid Disappointment
While a cartoon is extremely helpful for keeping you on the right track, you may find that as you weave, you want to make changes to your original plan. There are no tapestry police!
Your creation is your own and indeed may benefit from revision as the weaving grows. But beware! While one of the pleasures of tapestry weaving is following new ideas that evolve as you weave, one of the art’s limitations is that you can’t change the placement, color, or shape of images in a tapestry once you’ve woven above them. Having a cartoon can help you avoid disappointment, especially in the overall balance of colors and shapes in your design.
Marking the Warp Directly
If you wish, you can use permanent marker to transfer your design to the warp threads before you begin weaving, rather than attaching the cartoon to the fabric. This practice does have a couple of disadvantages. First, the warp threads tend to move or twist slightly as you mark them, so that your lines may appear on the sides of the warp, rather than on the front where they are easy to see. Second, if you do decide you want to alter the design while weaving, the original lines marked on the warp can make it hard to imagine the placement of colors and shapes of your new design with clarity.
Tapestry Design: Keep It Simple
A very important piece of advice for planning your own woven tapestry design: Keep it simple! Don’t fall into the trap of creating something complicated — a potential pitfall for beginners, especially when working out a design on paper. (Ask me how I know!)
Whole volumes — in fact, whole courses — offer resources for studying and learning how to use the many elements that go into a good design. I encourage you to dig into them and have fun.
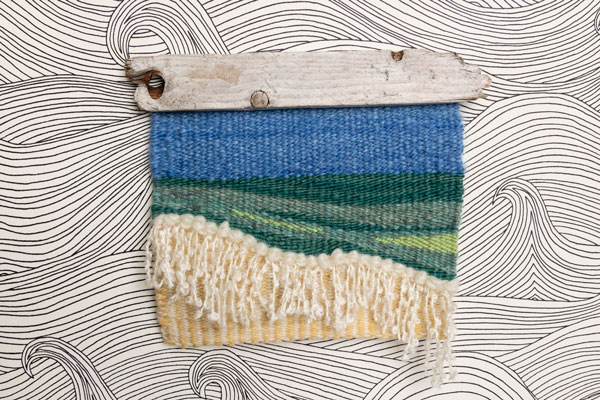
Get Started: Printable Cartoon for Weaving “Catch the Wave”
“Catch the Wave” is a simple design, made more interesting by the use of hand-dyed yarns and tapestry techniques that provide texture. The cartoon indicates only the design’s most basic shapes: the beach outlined by the wave, the sea, and the sky.
If you want to use the “Catch the Wave” cartoon, I’ve provided it here. Simply print it out and cut around the edges of the gray box.
Or, if you want to create a cartoon for your own design, measure and cut a piece of paper that matches exactly the size you want your completed weaving to be. Draw your design in pencil first, and once you are satisfied with it, go over the pencil lines with heavy marker. If you wish, color the basic shapes using colored pencil, markers, or watercolors.
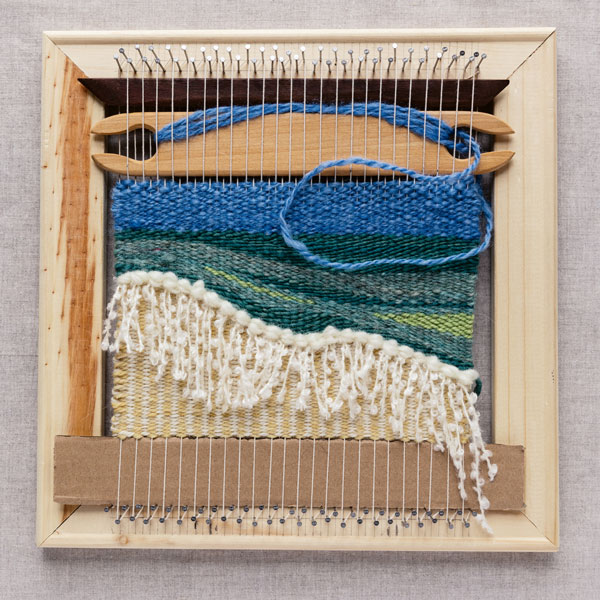
Weave several rows at the bottom of the tapestry to provide a foundation, and then pin or sew the cartoon to the underside of the woven area, aligning the sides and bottom carefully so that the cartoon is perfectly square with the warp. As you weave, allow the cartoon to roll back behind the area where you are working. You don’t need to crease it; just let it gently flop out of your way. As you work, smooth the cartoon back up behind the unwoven warp and refer to it for guidance on where to change colors and direction. It’s a bit like painting by number! After you’ve woven two or three more inches, again pin or sew the cartoon to the woven area. Once the weaving is complete, free the cartoon from the fabric by simply removing the pins or carefully snipping the stitches (taking care not to cut the warp or weft threads!).
Excerpted and adapted from The Weaving Explorer © Deborah Jarchow and Gwen W. Steege.