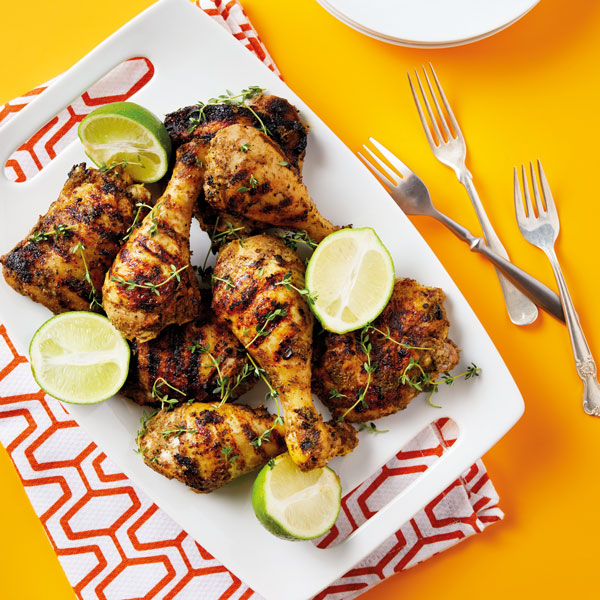
Jerk Chicken & the Whys of Dry Brine
Before you fire up the grill, give jerk chicken some time with dry brine — a mix of salt and herbs that results in crispy skin and tender, juicy meat.
Why Dry Brine?
Merriam-Webster defines the noun brine as “water saturated or strongly impregnated with common salt.” Dry, of course, means that no water is involved, which by the way, is why I prefer a dry brine — but more on that in a second.
To make a dry brine, you simply rub the chicken all over with salt and, if you want, other herbs and aromatics like lemon zest. The result is juicier, more tender meat and crispier skin. Though you’ll end up with something similar to a wet brine, there is a subtle difference.
Where a wet brine will plump the meat but make it harder for the skin to crisp, a dry brine does the opposite. The salt rub helps the skin crisp and the chicken retain its juiciness without plumping the meat with water. And it’s this difference, combined with the ease of a dry brine, that makes it my exclusive go-to for weeknight home cooking.
How to Make a Dry Brine
Pat the chicken dry with paper towels.
Sprinkle the chicken generously with salt. Use 2 teaspoons of fine table salt or, if you have it, double that amount of coarse kosher salt for a 3½ – to 4½-pound whole chicken or comparable amount of bone-in chicken parts. You can combine the salt with minced fresh herbs or dried herbs and spices. Aromatics like lemon zest make a lovely addition, too, depending on your final recipe.
Place a rack on top of a large sheet pan and rest the chicken on the rack. Place it in the refrigerator, uncovered, for at least 1 hour and ideally up to 24 hours, but not longer.
When it’s time to cook your chicken, remove it from the refrigerator and, if there’s time, allow it to come to room temperature before putting it in the oven.
Also — and this is important — if you have dry brined your bird, skip whatever salting your recipe calls for before cooking.
Jerk Chicken: Cook’s Notes
One of my older son’s first favorite foods was spicy jerk pork and chicken. Our friend Jenny, who took care of him for years, is from Jamaica and would bring him tastes of a family recipe. He fell in love instantly, heat and all. It was such a hit that one time she even had a heavenly hunk of smoky jerk pork FedExed to our house!
My version is delicious, though I’m not sure it will ever quite measure up. Between Jenny’s visits — and until we can visit her in her hometown — this version tides us over.
If you have the time to dry brine, you won’t regret it. Follow the directions above and skip the added salt in the recipe that follows.
Split leg quarters are usually sold at supermarkets as “chicken drumsticks and thighs,” with one package containing two drumsticks and two thighs. Alternatively, you may have to buy the bone-in, skin-on drumsticks and thighs separately, or you can buy whole leg quarters (the drumsticks and thighs still connected) and split them in half yourself.
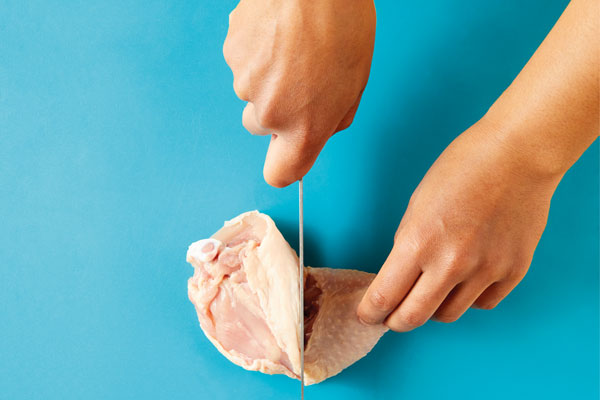
To split each leg quarter, find the joint between the leg and thigh by flipping each leg quarter over and looking for the fat line between where the drumstick and thigh meet. That’s exactly where you want to cut. To double-check that you’re in the right place, move the drumstick back and forth with one hand while your other feels around for the joint. Once you’re sure that you’ve found it, cut straight down. Your knife should cut easily into the space between the joint. If you meet a lot of resistance, you’re not in the right spot.
You need four drumsticks and four thighs, total, for this recipe.
Jerk Chicken
Yield: 4 servings
Ingredients
- 4 scallions, each trimmed and cut into 4 pieces
- 4 garlic cloves, peeled, trimmed, and smashed
- 2 hot chiles, such as jalapeños, habaneros, or more traditional scotch bonnets (listed from least to most spicy; gauge your family’s tolerance accordingly)
- ½ large onion, roughly chopped
- 1-inch knob ginger, peeled and roughly chopped
- ¼ cup lime juice (from about 2 juicy limes)
- 3 tablespoons soy sauce
- 4 teaspoons freshly ground black pepper
- 1 tablespoon neutral oil, such as grapeseed, plus more for brushing the grill
- 1 tablespoon dark brown or light brown sugar
- 1 tablespoon ground allspice
- 2 teaspoons fresh thyme
- 1 teaspoon ground nutmeg (freshly grated preferred)
- 1 teaspoon salt [if dry brining, skip this]
- Pinch of ground cloves
- 4 bone-in, skin-on chicken leg quarters, split
Directions
Add the scallions, garlic, chiles, onion, ginger, lime juice, soy sauce, pepper, oil, sugar, allspice, thyme, nutmeg, salt, and cloves to a blender, and blend until smooth. Set aside ¼ cup of the marinade (on the counter if cooking the chicken within 2 hours or in the refrigerator otherwise). Place the remaining marinade and the chicken in a bowl with a lid or in a large food storage bag and seal. Set on the counter to marinate for at least 2 hours or place in the refrigerator for longer, up to overnight.
Text and excerpted and adapted from Winner! Winner! Chicken Dinner © Stacie Billis.


Related Books
-

101 One-Dish Dinners
-

The Make-Ahead Sauce Solution
-

Fresh Flavors for the Slow Cooker
-

Build-a-Bowl
-

Fix, Freeze, Feast, 2nd Edition
