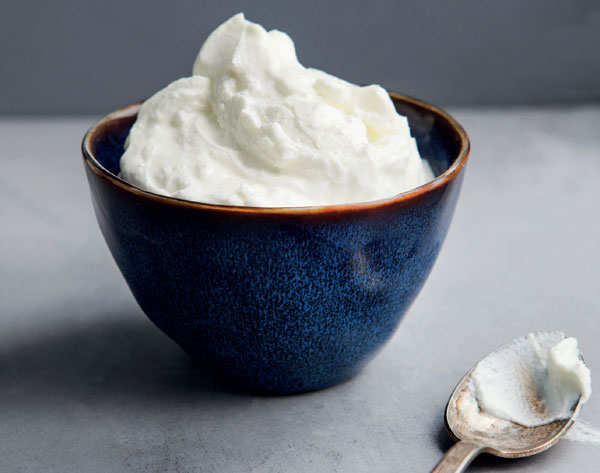
Incubate Yogurt Using Common Kitchen Equipment
Incubation is an essential part of the yogurt-making process, but you don’t have to buy extra equipment to get the job done.
To create successful ferments, you need to provide a comfy temperature for the microbes you are trying to cultivate. Some microbes, like those in kefir and many heirloom ferments, do well at room temperature, so all you need to do is set those ferments on the counter and wait. Most others are a bit more finicky and require that you put your ferment in a chamber that will allow you to better control the temperature. There are many ways to incubate yogurt, including electric yogurt makers, bread proofing boxes, and the sous vide method, all of which are described in Homemade Yogurt & Kefir. Following are some of the incubation options that use equipment even first-time yogurt makers are likely to have available.
Homemade Yogurt Incubation Options
Ice Chest
The simplest incubation chamber, and my go-to, is a small, well-insulated ice chest. Choose one that easily holds your incubation vessel with a little extra room to tuck jugs of warm water and/ or towels around the vessel. I drilled a small hole in the side of mine and stuck a thermometer through the hole so that I can monitor the inside temperature without opening the ice chest. I place a towel on the bottom of the ice chest, set the vessel in the middle of the towel, and tuck another towel on top and around the vessel. If the room is cool, I fill one or two jars with warm water (one or two degrees above the ideal incubation temperature) and add them to the chest. When tucked in like this, yogurt will ferment quite evenly.
Warm Oven
A gas oven with a pilot light can be a great option for incubation. Test the oven temperature by setting a thermometer in a glass of water and placing it in the oven, or use a grill thermometer with a heatproof cable. If it exceeds the desired temperature, try opening the door a bit or propping it open with a utensil and see if it will maintain the right temperature. If you don’t have a gas oven, you can place a portable light in the oven, which is what my parents did when they first learned to make yogurt in the 1950s. You want the kind of light that comes with a clamp and a screw-on metal cover, and you’ll need a traditional incandescent bulb to create the heat (compact fluorescents and LEDs likely won’t provide enough heat). For incubating at 110°F to 115°F (43°C to 46°C), use a 100-watt bulb; for incubating at 116°F to 122°F (47°C to 50°C), use a 200-watt bulb. And be sure to place a sign or other alert on the door noting that the oven is being used for ferments, just in case someone wants to turn the oven on and pop in a batch of cookies while you are fermenting!
Multicooker
I’m a sucker for a good tool, whether for the kitchen or the farm, and the latest and greatest in many people’s culinary toolshed is the multicooker. These electric cookers can sear, sauté, simmer, and pressure-cook. Many have a yogurt-making setting that allows you to make batches of yogurt. Some cookers, such as the popular brand Instant Pot, have stainless-steel inserts, while others have nonstick coated inserts. I prefer the stainless steel.
Some milk ferment recipes suggest you heat-treat the milk to denature the proteins and improve the texture of your finished product. Multicookers with a yogurt-making setting often have an option for heat-treating the milk, but I’ve found it isn’t that effective. It’s better to heat-treat the milk on your stovetop, cool it, and then use the multicooker for the incubation phase.
You can make your yogurt directly in the multicooker, or you can use it as a hot water bath: fill the insert with water, place the yogurt in glass jars, and place the jars in the cooker with or without a rack. I prefer the water bath approach, so that I don’t need to transfer the yogurt to jars once it is done incubating. The water bath also provides a more even temperature.
Unfortunately, there are no precise temperature setting options on multicookers, so if you need to ferment at a temperature that is higher than the default temperature of 110°F/43°C, then the multicooker isn’t a good choice.
Food Dehydrator
If you own a food dehydrator with a door and slide-out shelves, then you have a great incubator option. If you own the variety with stacking trays, like I do, jars of yogurt won’t fit inside. Food dehydrators have an adjustable thermostat that controls the temperature over the perfect range for making yogurt (and beyond). You’ll want to verify the temperature by using a thermometer inside the yogurt or a test jar of water, so that you know the yogurt — not just the air inside the dehydrator — is at the right temperature. Dehydrators also include a fan, which isn’t needed for incubating yogurt, but it will run nonetheless.
TEXT EXCERPTED FROM HOMEMADE YOGURT & KEFIR © 2020 BY GIANACLIS CALDWELL. ALL RIGHTS RESERVED.
Learn More


Related Reads
Featured Titles
-

The Home Creamery
-

Home Cheese Making, 4th Edition
-

Say Cheese!
-

The Big Book of Kombucha
-

Fermented Vegetables

