How to Cure and Cook Your Own Bacon
Home-cured bacon tastes unlike anything you can buy in a store, but if you want to make use of the grease for cooking, baking the bacon is your best bet.
Salt preserves food, fats included.
Chances are our ancestors first salted meats — and fats — just to preserve them, then they found that salting transformed the flavor of those foods, improving them. They created the art of charcuterie or salumi, along with hundreds of recipes and techniques. Several fatty cuts of pork, including the belly or side meat, fatback, and jowls, can be cured.
During curing, salt in a brine or dry cure draws moisture from the fat and creates an environment hostile to spoilage bacteria. Herbs and spices might add flavor; sugar may be added to balance out the salt. A cured piece of meat or fat will be firm enough to slice thinly and neatly.
The salt used to cure fat (and meats) can be regular sodium chloride in the form of kosher or sea salt, or it can be a curing salt that has nitrates mixed in. The nitrates in curing salts add flavor, preserve the meat’s rosy color, prevent the fat from developing acidity, and inhibit undesirable bacteria from growing. Table salt should not be used because it contains additives — and people can taste the iodine that is often added to table salt.
Bacon is made from pork belly.
It is always cured and then partially cooked by roasting or smoking. Home-cured bacon is a revelation. Its freshness gives it that extra quality, which you won’t find even in artisan bacon you might buy.
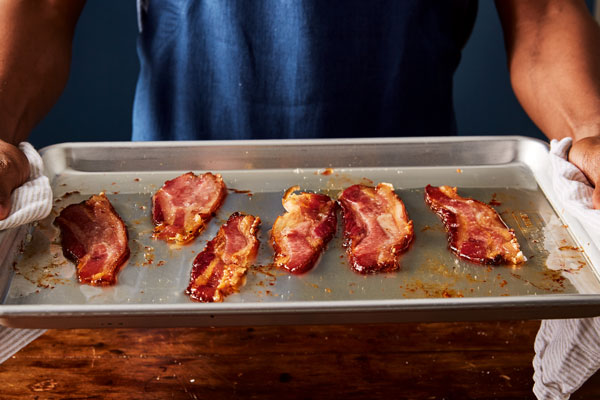
If you want to save your bacon grease to cook with, it is important to avoid burning it. The best way to avoid scorching the grease is to bake the bacon. Here are the steps:
Arrange the bacon strips on a sheet pan and place the pan on the center rack of a cold oven. Turn the oven on to 400°F and bake for 20 to 35 minutes, depending on the thickness of the bacon strips and how quickly your oven reaches the target temperature. The bacon is done when it is golden brown and crisp.
Transfer the bacon to a paper towel-lined sheet pan to absorb any excess fat. Pour the hot bacon grease through a strainer lined with a coffee filter into a glass jar. Keep the bacon fat refrigerated.
A Few Words on Bacon Grease and Baking
I love bacon as much as the next baker, but I do not like bacon grease in my baked goods. The operative word here is “grease.” Baked goods made with bacon grease instead of butter or lard taste greasy. Cooked bacon bits add an intriguing flavor to cookies and muffins and such, but save the bacon grease for frying your eggs or making grilled cheese sandwiches.
Home-Cured Bacon
This recipe, which is adapted from Michael Ruhlman’s excellent book Charcuterie, requires the use of pink curing salt #1. You can get by with all kosher or sea salt, but the bacon will look like well-cooked pork (grayish), taste more like salty pork than like bacon, and will keep for only a week in the fridge. You can easily double this recipe, and freeze whatever you won’t eat within two weeks.
Makes about 2¼ pounds
Ingredients
- 2 tablespoons kosher salt
- 1 teaspoon pink curing salt #1
- 2 tablespoons coarsely ground black pepper
- 1¼ teaspoons Chinese five-spice powder (or substitute other sweet ground spices, such as cinnamon, coriander, mace, cardamom, allspice)
- 2 tablespoons honey, maple syrup, or brown sugar
- 3 garlic cloves, minced
- 1 (2½-pound) piece pork belly, trimmed to a square or rectangle
Directions
- Mix together the kosher salt, pink curing salt, black pepper, five-spice powder, honey, and garlic in a small bowl. Rub the salt and spice mixture all over the meat.
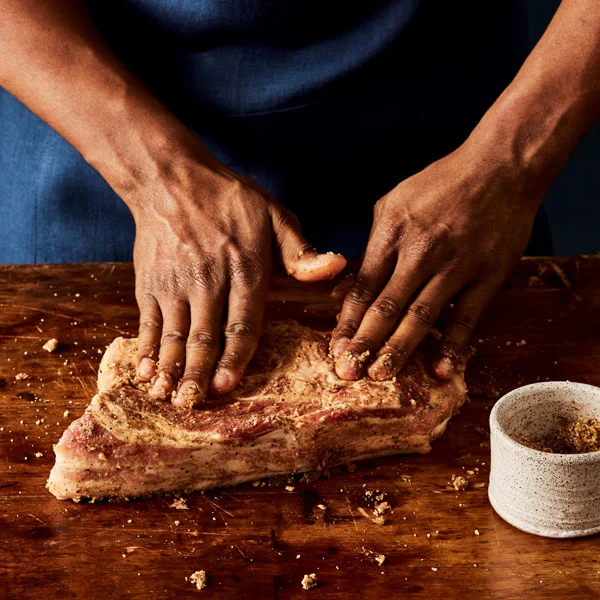
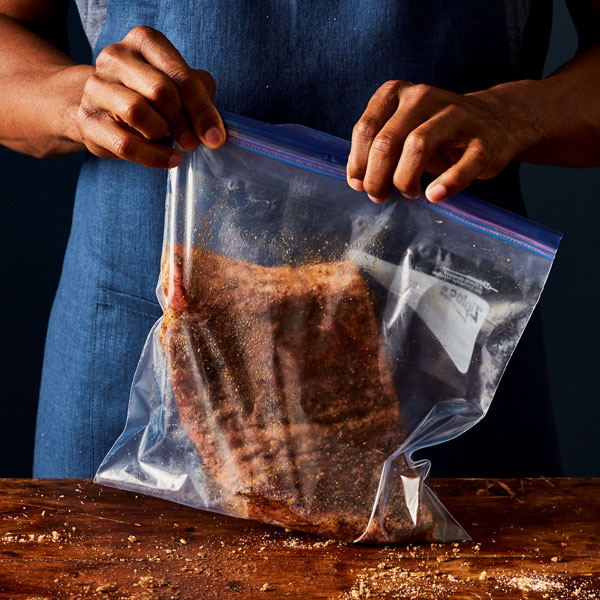
2. Put the pork belly in a gallon-size resealable plastic bag, on a sheet pan, or in a plastic container. Close the bag or cover the meat with plastic wrap and refrigerate for 7 days, turning it over and rubbing the spices into the meat midway through the week.
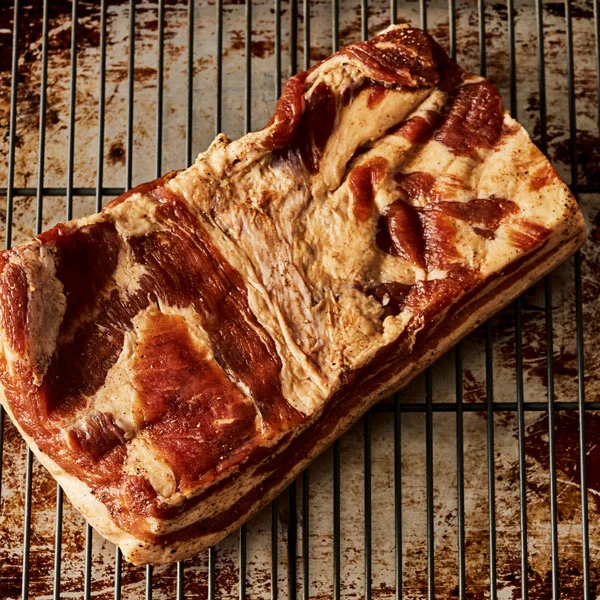
3. Preheat the oven to 200°F or prepare a hot smoker. Remove the bacon from the refrigerator, rinse off all the seasonings under cold water, and pat it dry. Put the meat on a wire rack set on a sheet pan.
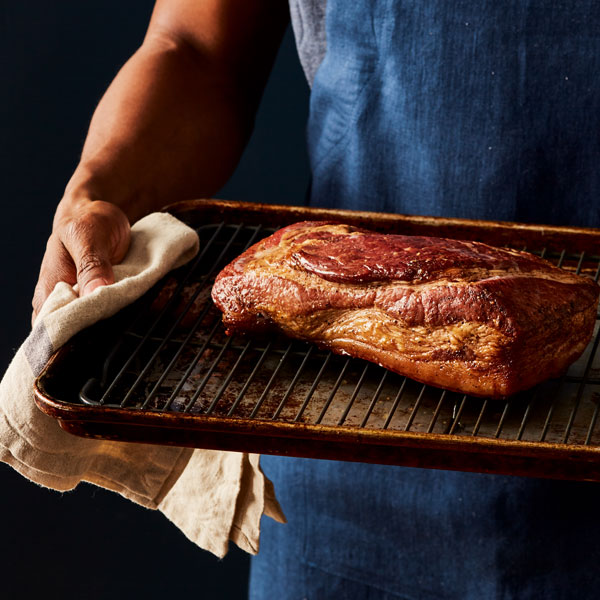
4. Roast for 1½ hours or hot-smoke for 4 to 6 hours, until the meat reaches an internal temperature of 150°F. Allow to cool to room temperature.
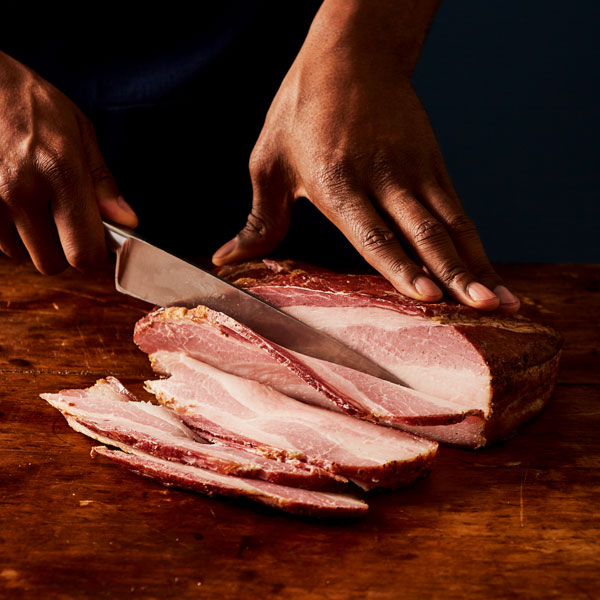
5. Wrap the bacon tightly in plastic wrap and refrigerate overnight. Slice, then cook in a pan or oven like any other bacon. If the bacon is difficult to slice, place it in the freezer for 1 or 2 hours, until the meat is firm but not frozen hard.
Text excerpted and adapted from The Fat Kitchen © Andrea Chesman.

The Fat Kitchen is the comprehensive guide to rendering and using whole animal fats, including lard, tallow, and poultry fat. Cooks will learn the distinctive qualities and best uses of each fat along with methods for curing and storing them. In addition, 100 scrumptious recipes highlight traditional cultural favorites like matzoh ball soup, pasta carbonara, pork tamales, roast beef with Yorkshire pudding, Southern-style collards, confit chicken, New England baked beans, and jelly doughnuts.

Related Books
-

Cured Meat, Smoked Fish & Pickled Eggs
-
Home Sausage Making, 4th Edition
-
Butchering Poultry, Rabbit, Lamb, Goat, and Pork
-

The Beginner's Guide to Dehydrating Food, 2nd Edition
-

Home Cheese Making, 4th Edition