How to Press Loose Powders into Makeup Pans
Pressing lustrous loose powders into makeup pans allows for easier, controlled application of cosmetics when you need to achieve a more precise look.
Making mineral makeup means that, most often, your formulations will be stored and applied in loose powdered form, straight from a cosmetic jar. But for cosmetics like eye shadow, working from a compact may be preferable for easy and controlled application. Fortunately, pressing loose powder into a compact — whether you’re reusing a compact from a store-bought product or buying your own containers — is a relatively simple process.
Pressing Powders
In order to create pressed compacts, you will most likely need some kind of binding agent to help hold the powders together. One of the perks of making your own mineral makeup is that you have control over what kind of binder you use. Your choices include powders surface-treated with wax or powders that have their own natural binding properties. If you choose to use oil, you can use those that do not clog pores, are minimally processed, and/or are actually beneficial to certain skin types.
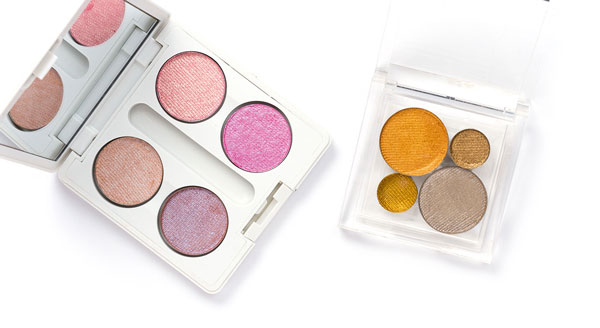
You can select from the various pan shapes and sizes available for pressed powders. Round tins are most common, but you can also find square or rectangular pans, as well as half- and quarter-circle tins, which you can piece together to form a complete circle.
To determine the size of each pan you will need, consider how much of each product you use and how often you use it. Eye shadows, eyebrow powders, and eyeliners often are pressed into 26-millimeter round metal pans, but you can opt for containers as small as 15 millimeters or as large as 36 millimeters. The most common round metal pans for blushes, bronzers, highlighters, concealers, color correctors, and foundations are 36 millimeters and 44 millimeters. A 57- millimeter round tin — the largest you can buy — fits into most single compacts.
The next step is to decide what kind of compact or palette you would like to display your makeup in. Your options are limitless; be creative! While some people purchase new palettes, others reuse old makeup containers or even make their own out of mint tins, CD or DVD cases, or other hinged boxes. As long as your container is sanitized and has a lid to keep your makeup free of dust or other contaminants, you can use practically anything as a compact.
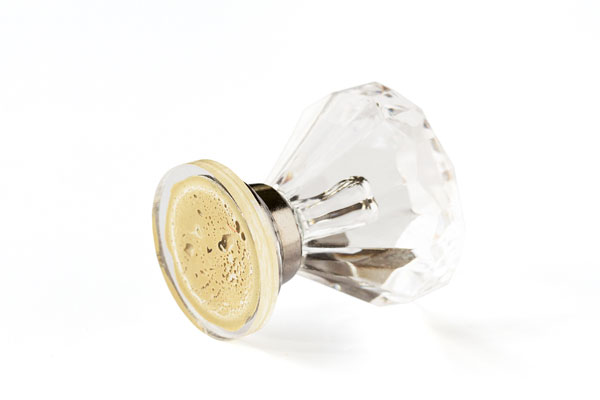
I buy my palettes online in bulk, then line them with sticky magnetic paper so the metal pans with pressed powders stay put in the display. You can also glue your pans to the inside of the compact. Before doing so, wipe the bottom of the pans to remove all powder. Add a single drop of permanent adhesive craft glue or hot glue to the bottom of the pan, then place it in your container and gently press on the pan sides to secure. Lay the container down flat and let the glue set overnight.
How to Press Makeup Pans
You can press lustrous loose powders into makeup pans using any tamping tool. Matte powders are extremely delicate and best left loose. Follow the directions below for a beautiful finished product.
Note: The quantities in these directions assume you are pressing one of the eye shadow recipes from my book into a 26-millimeter pan. If you are making other recipes or pressing into a pan of a different size, you will need to experiment with quantities.
You Will Need
- Ingredients for the eye shadow recipe you want to press (if you’re working from my book, make sure to use the recipe for Makeup Base for Pressed Powders); to fill one 26-millimeter pan, you will need to make approximately 1½ batches of the eye shadow recipe
- 1 tad fractionated coconut oil (a refined version of coconut oil often used in aromatherapy), or more as needed to reach the desired consistency
- 1 dash plus 1 pinch rubbing alcohol (preferably 91%), or more as needed to reach the desired consistency
- Your preferred mixing tools
- Tamping tool
- Makeup pan
- Clean fabric or stamp to create a decorative finish
Steps
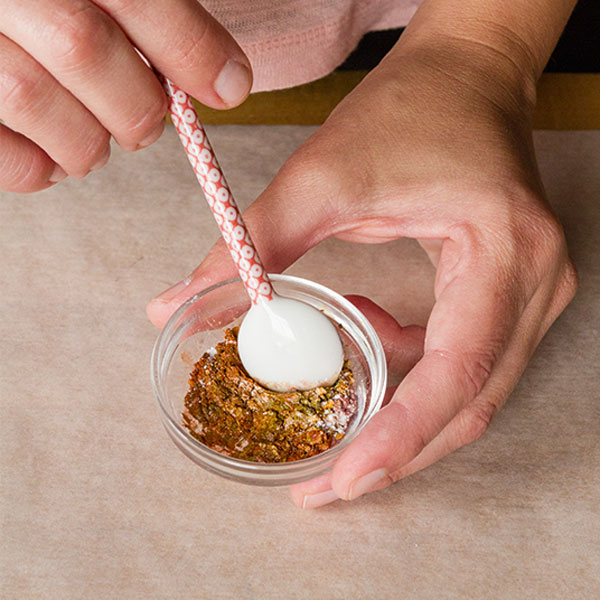
Step 1: Mix together all the ingredients in the recipe you want to press, making sure there are no streaks or lumps.
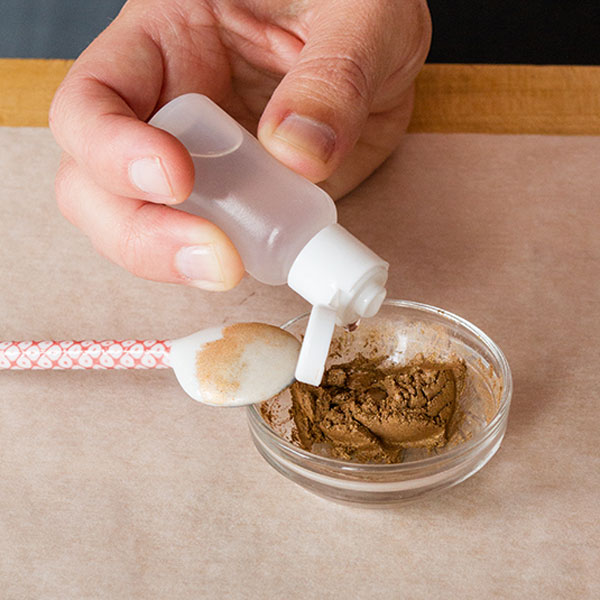
Step 2: Add the fractionated coconut oil and rubbing alcohol and stir into the powders until you have the consistency of wet sand. If your mixture is not there yet, add more oil or alcohol, one drop at a time, as needed. The oil binds the powders together, while the rubbing alcohol helps to evenly distribute the oils and turns the mixture into a liquid so it can be smoothed and pressed.
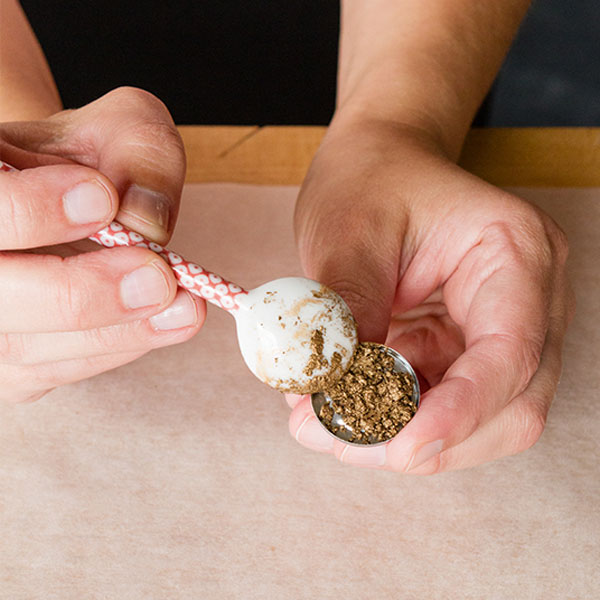
Step 3: Fill the pan with the moistened powder, making sure that it is distributed evenly. Smooth out the top of the mixture.
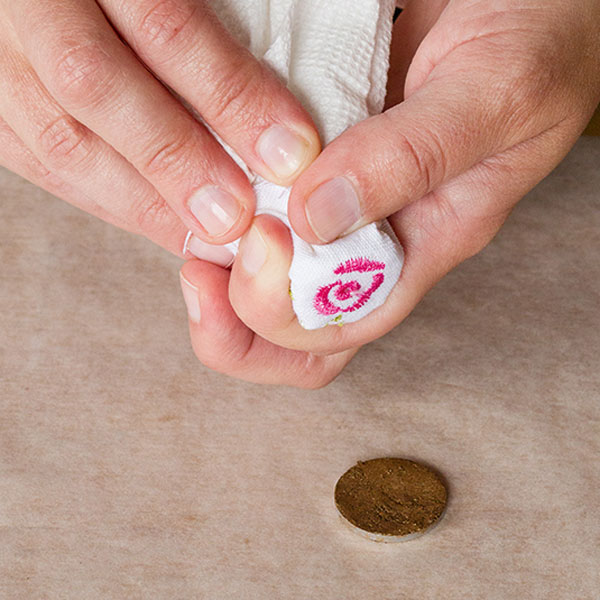
Step 4: If you are using fabric to create a textured top, layer and twist it over the tamping tool to create a smooth surface.

Step 5: Center the tamping tool or the decorative stamp in the pan and press down firmly. Some of the liquid and color should wick through the fabric, if using. Keep pressing until most of the liquid is removed from the product.
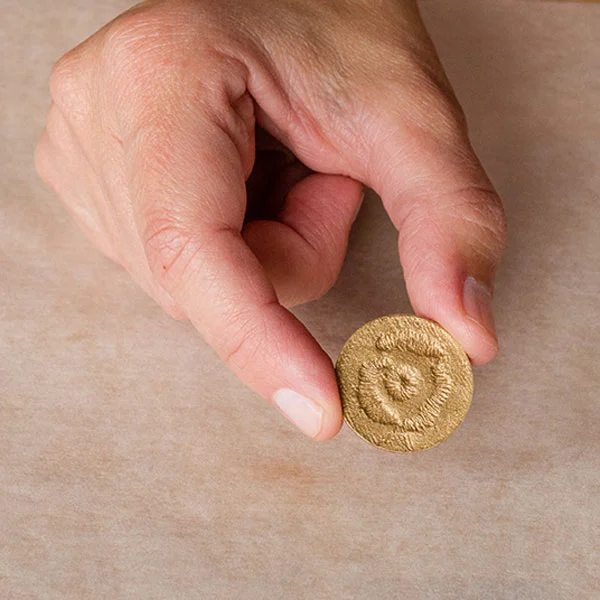
Step 6: Let dry for 12 to 24 hours before using.
Excerpted And Adapted from Make Your Own Pure Mineral Makeup © Heather Anderson.


